Options
じゃあ、いつも通りのところから始めていきます☺️
luaディレクトリにoptions.luaとでもしてファイルを作成しましょう。
で、init.luaからrequire()するんでしたね。
もうバッチリですね🤗
help
これ…、超重要なやつなんで…。
心して…! Neovimのコマンドから打ってください…!!
:h help
もしくは
:help help
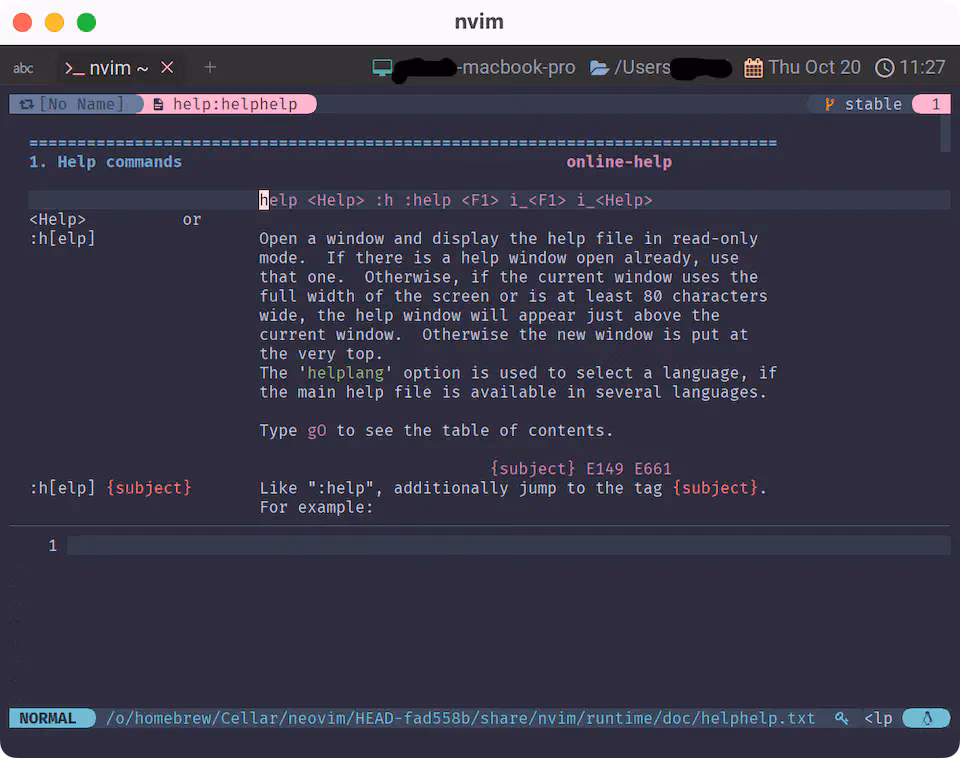
helpのヘルプが開きましたね🤣
色々書いてありますが、とりあえずはこれだけ覚えていればOK❗重要だぞ😉❤️
:h[elp]           Open a window and display the help file in read-only mode.
                  ウィンドウを開き、ヘルプファイルを読み込み専用で表示する。

                  Type |gO| to see the table of contents.
                  目次を見るには、gO (←大文字のアルファベットO) とタイプする。

:h[elp] {subject} Like ":help", additionally jump to the tag {subject}.
                  ":help" と同様だが、さらに {subject} というタグにジャンプする。

                  For example:
                    :help options

                  If there is no full match for the pattern, or there
                  are several matches, the "best" match will be used.
                  A sophisticated algorithm is used to decide which
                  match is better than another one.

                  パターンに完全一致するものがない場合、あるいは複数一致するものがある場合は、
                  高度なアルゴリズムによって「最も」一致すると思われるパターンが使用される。
:hでヘルプのトップページ、:h {subject}でヘルプを検索してヒットしたタグにジャンプ。ということですね。
今回は後者でした。helpタグに直接飛びましたよね。
閉じるときは:qとか:bdでいいんですが、頑張りすぎて ぐちゃぐちゃ になっちゃう時があるので、
併せて:helpc(or :helpclose)も覚えておくと安心です☺️
:helpc[lose]    Close one help window, if there is one.
  Vim will try to restore the window layout (including
  cursor position) to the same layout it was before
  opening the help window initially.

  ヘルプウィンドウがある場合、それを閉じる。
  Vim は、ウィンドウのレイアウト(カーソル位置も含む)を、
  最初にヘルプウィンドウを開く前と同じレイアウトに戻そうとする。
ヘルプの使い方さえわかってしまえば、もうこっちのもんですね🤗
きみは いま❗
nvimちほう への
だいいっぽを ふみだした❗
なんだったら タウンマップで
かくにんして ごらん❗